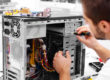


If your screen image problem is due to a malfunctioning laptop screen, and you are adept with a screw driver, you can replace it yourself. The laptop screen repair is usually straight forward, and can be done in an hour depending on the computer. Here 10 steps that will help you to do so.
- Unplug your laptop, and pull the battery out. This step is important so that you don’t damage any of the electrical components.
- Locate the rubber bumpers around the plastic casing surrounding the screen. Pull each of these off, and save them in a small container. Under each of these there will be screws that we will loosen in the next step.
- Remove all the screws under the rubber bumpers. Save these in your plastic container. You may also need to remove the screw for the hinges depending on the model of computer you have.
- Gently pull the plastic bezel away from the back housing. Be patient, and persistent with this step. You may need to use the credit card to gently slide between the plastic front bezel and back cover.
- There will be additional screws attaching the screen to an inner frame. Loosen these screws, and remove them. The screen will be connected by a wire. Unplug this wire, and lift the screen out of its frame.
- On the back side of the screen you’ll find the part numbers. You’ll need this exact part number to order a new screen from a vendor.

- Order parts from a reputable vendor. Make sure the vendor sends you an exact match, or compatible part for your computer.
- Plug your new screen into the laptop using the cable connector. Plug in the computer, and turn it on. The new screen should turn on. You can test the screen this way before putting everything back together. If the screen works, then unplug the computer, be sure the battery is removed.
- Overturn the steps, and put the computer back together.
- Use the Elmer’s glue to re-seat the bumpers.
These 10 basic steps cover the replacement of screens or monitors for most laptop computers. Follow these steps for your laptop screen repair.