 As we mentioned in a previous article, the greater amount of RAM that our PC has at its disposal, the greater the performance. This is because RAM memory consists of parts (chips) where data is stored momentarily as we work with it on our computer.
Therefore, many users increase their RAM memory to obtain real beneficial increases of their PC’s processing speed. Notwithstanding, it isn´t enough to simply acquire the correct RAM memory modules for our motherboard, but these must also be perfectly installed, so that they function correctly and are detected by the operating system and are assigned tasks.
Some users turn to specialized technicians when installing new memory modules, although the simplicity of this task makes it possible for any user to personally perform it.
When installing a new RAM memory module, it is necessary to take into account a number of factors, such as, that the new module is the same as the one that is already installed in the PC.
Once we are ready to change the memory module, and in our hands we have the new RAM memory that we have acquired, we must follow a series of steps patiently, taking all the necessary precautions.
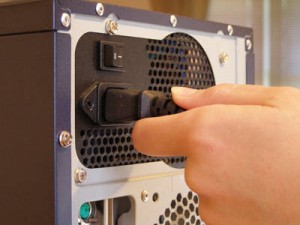
1. The first thing we need to do is to turn off the computer and disconnect it from any power source, to avoid any possible electrical discharges.
2. We need to open the case and carefully do the task without accidentally disconnecting any other of the computer’s components.
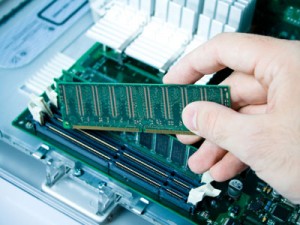
3. The next step is to find the RAM memory sockets (slots) on the motherboard to insert the new module(s), these must be empty or contain modules that we wish to replace, and must be withdrawn carefully. Once the new module is in our hands, it is important to not touch the flat surfaces or copper contacts, the correct way to handle a memory module is by its edges, to avoid possible damages to its circuitry.
4. A similar precaution is that when we place the module in the motherboard slot, making sure its copper contacts match those of the slot, and verifying that the RAM memory fits perfectly into the slot. IMPORTANT: If we are installing a DIMM type memory (currently the most used), we will notice that when we press down in the slot while placing it, the components will make a snapping sound, indicating that the memory module has been correctly inserted.
5. Once the new modules have been inserted into their corresponding slots, we can now close the case, connect the computer to a power source, then turn it on, and verify that the RAM memory is detected adequately by the operating system.
To do this, when the computer is turned on, a series of numbers on the first boot screen will be displayed, where we can find the amount of RAM that our computer has in a message that reads: “Memory Test: xxxxxK OK”, this value is in kilobytes, which is interpreted in the following manner:
65536K : 64 Mb
131072K : 128 Mb
262144K : 256 Mb
393216K : 384 Mb
524288K : 512 Mb
786432K : 768 Mb
1048576K : 1024 Mb
2097152K: 2048 Mb
We can also check the amount of memory that our computer has by double clicking on “My Computer”, while holding down the ALT key, this will allow us to access the system properties.
If the installation was done correctly, no errors will be reported during RAM detection. Notwithstanding, if we notice some kind of error, reported with error messages, system instability, or simply because the system does not detect the total amount of installed memory, it is recommended to perform a series of tests to verify the functionality of the RAM memory modules.
Errors can be caused by hardware or software failures; this why it is recommended to perform a full memory test or call a specialized technician to diagnose and solve the problem. If you need professional technical advice to see which RAM memory module you should buy, as well as to how to install the memory module, call 911-computer.com and one of our specialized technicians will visit you at your home. We offer consulting services, computer maintenance and repair in all of Houston, Texas. We’re waiting for you!


